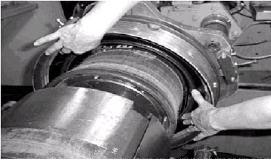
On the “flat forming” drum or “first stage” tire building
1. Bead application – The bead wires are set at the applicators. After body ply mounting it is automatically applied onto the semi – processed green tire
1. Bead application – The bead wires are set at the applicators. After body ply mounting it is automatically applied onto the semi – processed green tire
2. Innerliner – The tire starts with a double layer of synthetic gum rubber called an
inner liner. The purpose of the inner liner is to seal in the air and make the tire tubeless
inner liner. The purpose of the inner liner is to seal in the air and make the tire tubeless
3. Plies – Then the plies of the fabric coated with rubber are laid so that the cords
run alternately at opposite angles to the eventual line of the tread thus giving the
carcass balanced strength and shape.
run alternately at opposite angles to the eventual line of the tread thus giving the
carcass balanced strength and shape.
Essentially one layer ties the beads together in one direction and
another layer in another direction. The plies used are of different grades and
sizes depending on the grade and size of the tire. In radial tire the number of
layers of cord may be one or more depending on the tire’s required strength.
4. Ply stitching – The plies are stitched or rolled into position, following the contour
of the core carefully so that no air gets trapped between them.
5. Bead and apex laying - The beads are then placed in position and two strips
called apex (or bead filler) stiffen the area just above the bead.
6. Bladder inflation - Now a bladder on the drum is inflated which forces the end
wrappings of the body plies to turn up a nd cover the bead assemblies.
another layer in another direction. The plies used are of different grades and
sizes depending on the grade and size of the tire. In radial tire the number of
layers of cord may be one or more depending on the tire’s required strength.
4. Ply stitching – The plies are stitched or rolled into position, following the contour
of the core carefully so that no air gets trapped between them.
5. Bead and apex laying - The beads are then placed in position and two strips
called apex (or bead filler) stiffen the area just above the bead.
6. Bladder inflation - Now a bladder on the drum is inflated which forces the end
wrappings of the body plies to turn up a
 nd cover the bead assemblies.
8. Chafer – When all plies and beads have been put, a narrow strip of reinforcing
pliant fabric called “chafer” or rim cushion is put in the parts near the wheel rim
to meet continual flexing of the tire in the movement.
Thus the base structure of the tire is formed which links the two beads together.
This tubular casing or “carcass” is ready for the second stage in tire building
“tire shaping” or “second stage” tire building
1. Steel belts (only for radial tires) – Steel belts that resist punctures and hold the tread firmly to the road are added.
2. Cap ply (only for radial tires) – Over the steel belts one or two cap – plies are put.
The cords of the cap – ply are laid crosswise to the casing plies to form shape-retaining triangles
3. Breaker – The “breaker” (or undertread) fabric, heavily cushioned with layers of
rubber compound is placed on the line of the tread to absorb road shocks and
spread them evenly over the tire carcass.
4. Tread – After this the tread is the last part to go on the tire.
The second stage gives the skeleton into which the tubular casing from the
first stage is accurately inflated to form a green tire ready for molding.
5. Inline transfer
At each stage of tire assembly care is taken to apply pressure to the
consolidated layers to expel any air present between them. Presence of air
between the layers poses a problem during curing and also deteriorates the
adhesion of rubber with the cords over time.
The final product at this stage is the “green tire” in which the components
are held together mechanically by the tack or stickiness of the tire components.


No comments:
Post a Comment